Finn O'Brien
Last updated: 27 January 2026
In this article, you will find:
Navigation guidance for accessing and enabling the On-Premise Detection feature for Windows device.
Note: The On-Premise Compliance Detection feature is currently in beta and may change. Please refer back to this article for the latest guidance, as processes or interaction points may be updated in future releases.
The Windows On-Premise integration allows you to scan on-premise devices that were not previously supported by the OneClickComply platform. Using this feature, you can assess device compliance against your selected frameworks, and address any identified non-compliance.
Select Integrations from the navigation bar on the left side.
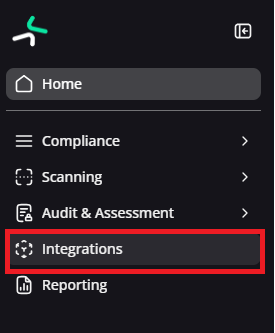
Navigation guidance for integrations
Click the Add button, located underneath the Windows (On-Premise) integration.
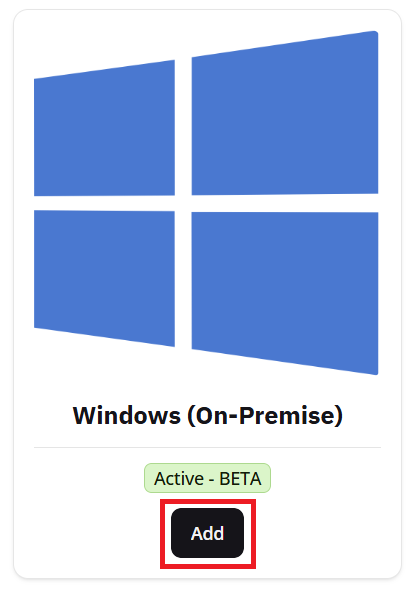
Adding a new integration
Click the Add Connection button, and assign a friendly name to this new connection name (one that you don't mind seeing in various different areas of the platform).
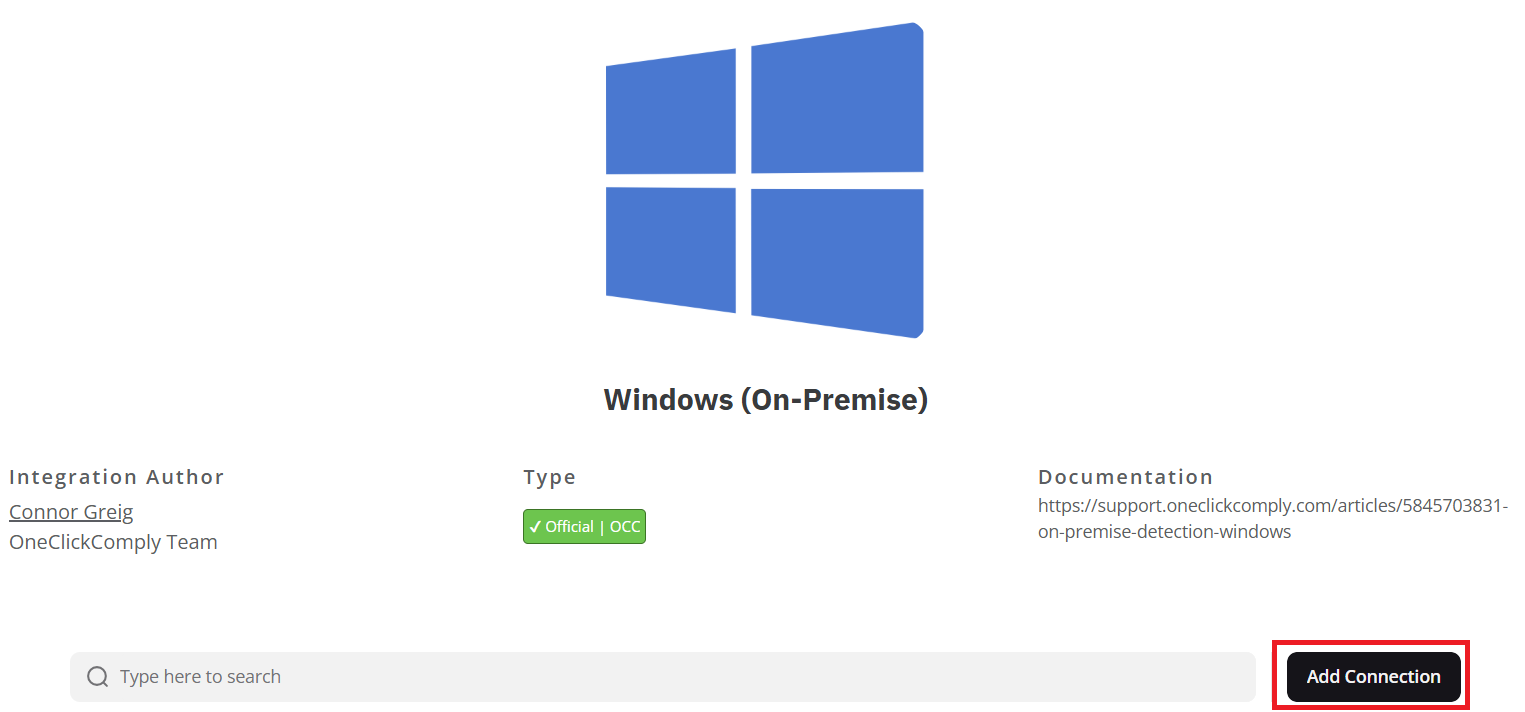
Guidance for adding a new connector
Your new connection will appear in the table below the Add Connection button. Hover over the row containing your new connection, and click the '...' button located on the right-hand side of the table.

Completing setup for new integration
Click the Setup Windows On Premise option.
When this new side window opens, a support wizard will take you through each of the important areas on this page. You can use the Back and Next buttons to navigate between each highlighted area, as shown in the example below:

On-premise support wizard
Note: To open the support wizard again, click the ? icon at the top right of the page.
Once you’ve reviewed this information, follow the steps provided to configure Compliance Detection on your selected Windows devices.
In order to enable On-Premise Detection for your chosen devices, you will need to do the following:
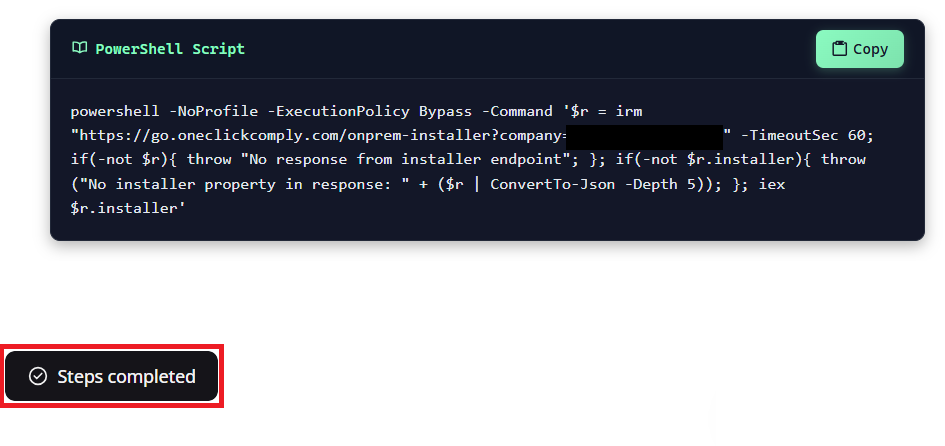
Copy the PowerShell script (which will look similar to the example below):
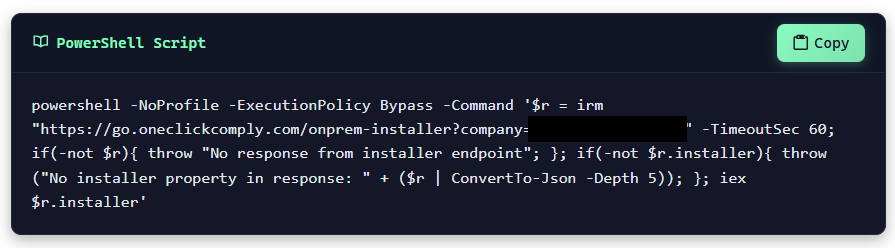
Example powershell script
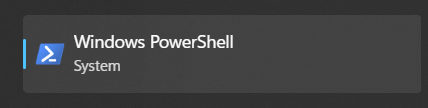
On the device(s) you wish to enroll, open Windows PowerShell by typing 'powershell' into the Windows search bar.
(Alternatively, if you would like to configure multiple devices, you can assign and deploy this script via Microsoft Intune.)
Opening windows powershell
Paste the script into Windows PowerShell and press Enter to run it.
Once the script runs, it automatically creates a scheduled task on the device to check for non-compliant settings and configurations. This scan runs weekly, and the results are sent to the OneClickComply platform.
Return to the OneClickComply platform and click the Steps completed button underneath the PowerShell code block, as indicated below.
Marking on-premise integration as complete
This updates the Windows On-Premise connection to Paired, and the support wizard will no longer appear when you reopen this panel.

Updated paired status
Note: When the On-Premise Detection script is run on a device, that device is automatically added to your Physical and Virtual Asset Register under ISMS within the OneClickComply platform.
(You will still need to provide additional information about the device within the register, such as the Asset Owner, Importance, Status, and Location, in order to comply with industry standards and frameworks.)
Now that On-Premise Compliance Detection has been enabled on your chosen devices, you can now begin resolving any identified non-compliance on these devices. These issues will appear as Tasks within the OneClickComply platform, and are viewed and actioned in a similar fashion to both Technical and Operational tasks.
To view these issues, navigate to Compliance > Tasks > Assigned Tasks to access a list of all your compliance tasks, as shown below:
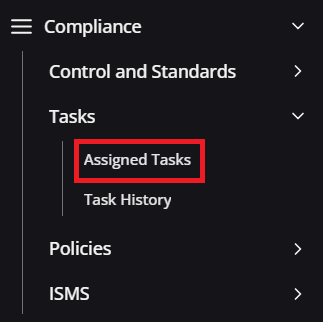
Navigation guidance for accessing the all tasks area
This will bring you to the All Tasks tab of the Tasks area, which will show you a comprehensive list of all outstanding tasks on your account.
To only show tasks linked to your On-Premise devices, select the On-Premise Tasks (Beta) tab from the top of the screen, as shown below:
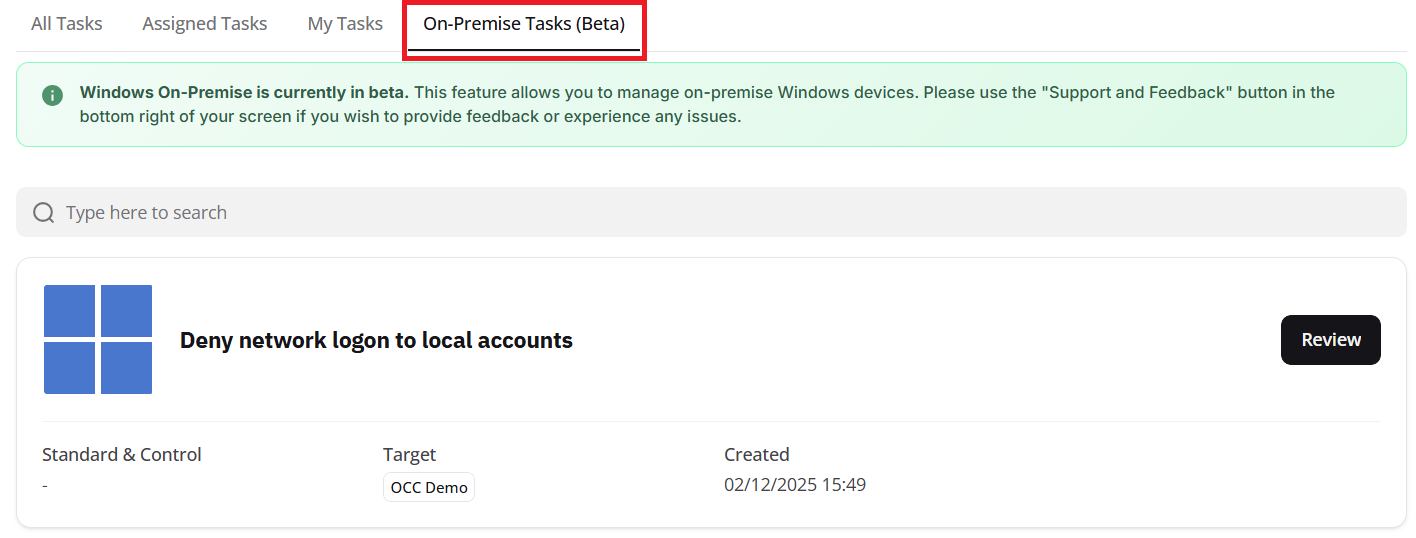
On-premise task list tab
Let's look at the task shown above 'Deny network logon to local accounts' and click the Review button to learn more about this specific issue.
There are three core pieces of information on this page that you should focus on:
Associated Standards: Underneath the title of the task, you will find a list of all the standards and controls that this task is linked to. It's crucial that any on-premise devices your organisation owns are configured in alignment with your chosen standards.
Status: If the status of the task is displayed as Not Started, this means that a device associated with this task has not been marked as remediated. If all devices have been marked as remediated, and no further issues have been detected, the status will update to Complete.
Task Details & Manual Steps: This area will outline why resolving this issue is important, and include the specific steps that you must follow on the impacted devices to resolve the issue.
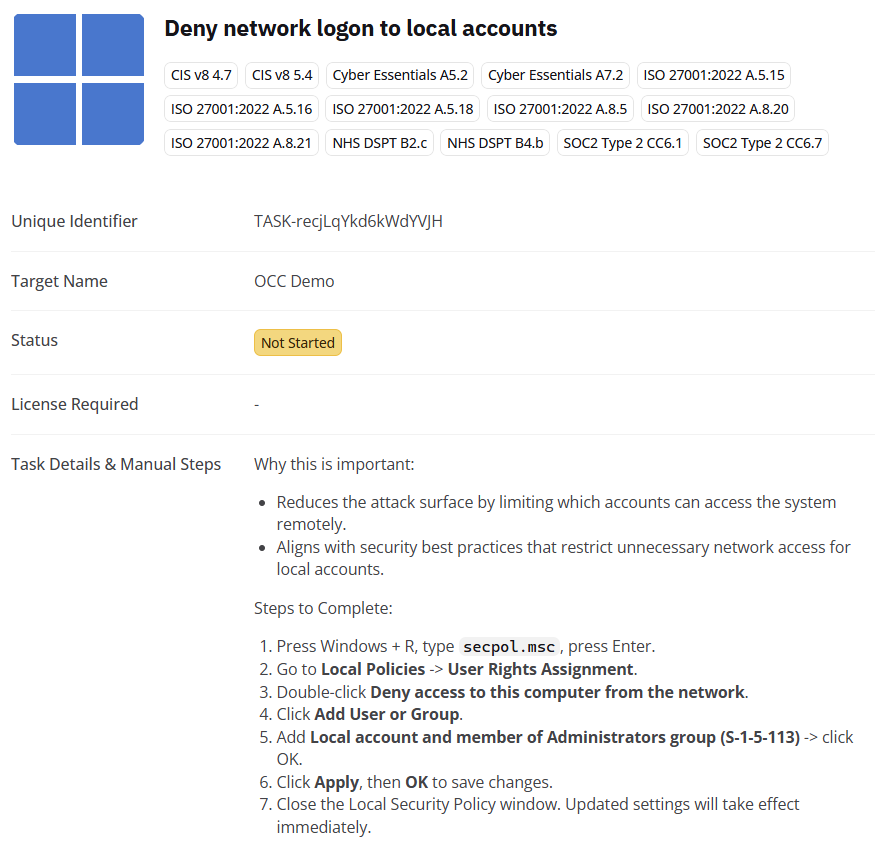
Reviewing an on-premise task
Before attempting to resolve this task, you'll need to know which of your devices are linked to this specific issue.
Scroll down within the task side panel, to find the Impacted Assets section. This list shows the devices linked to the task or issue. Devices that are already compliant will not appear here, helping you easily identify which devices require configuration.
Additionally, Impacted Assets (x) displays the total number of assets affected by the task. In the example below, this task has 4 impacted assets.
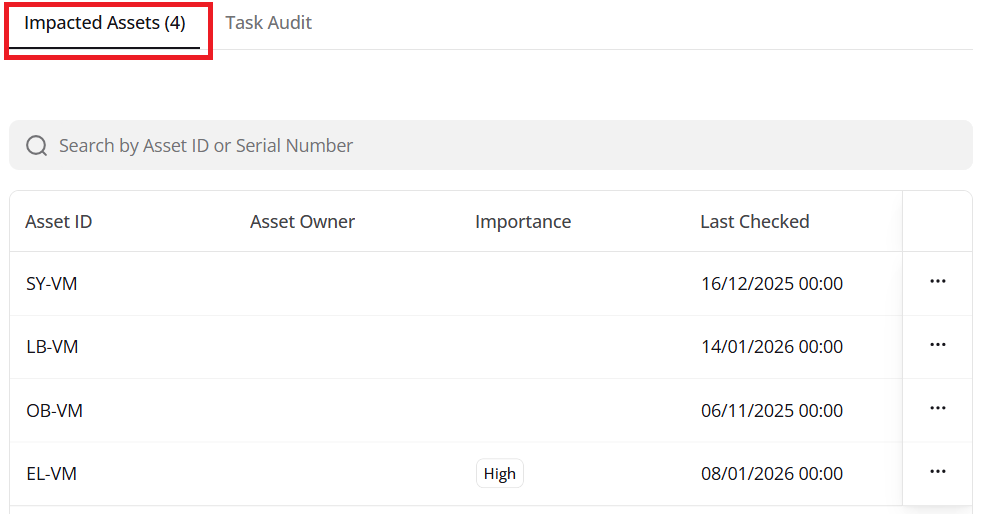
Impacted assets register
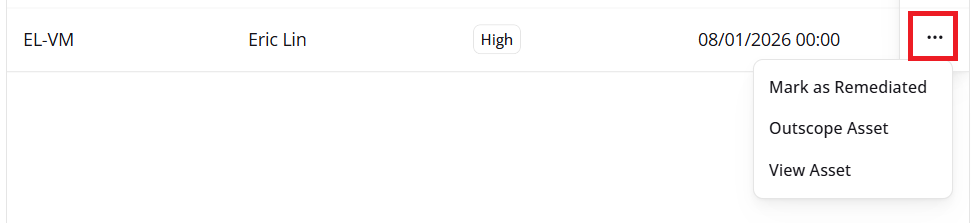
Using the example above, if we want to resolve non-compliance on the asset/device EL-VM, we simply need to follow the steps outlined in the Task Details & Manual Steps area of the task.
Once done, return to the Impacted Assets area and click the '...' button, found at the far right of the table. This will bring up a small drop-down, where you can choose to:
Mark as Remediated - which marks the issue as resolved for this individual asset
Outscope Asset - marks the issue as out of scope for the selected asset
View Asset - opens the record associated with this device in the ISMS Physical and Virtual Asset Register
Viewing and resolving impacted assets
Selecting Mark as Remediated tells the OneClickComply platform that the issue has been resolved on the device. When all impacted devices are marked as remediated, the task status automatically updates from Not Started to Complete.
Similarly, if all impacted devices are marked as Outscoped, the task status will also update to Complete.
If you would like to add more assets to your On-Premise integration, simply copy the same PowerShell script onto the other devices, and run once. This will create the necessary scheduled task, and return the scan results to the OneClickComply platform.
During the weekly scans of devices, if an issue is detected that was marked as remediated, the associated task will update from Complete to Not Started, allowing you to easily see which issues and assets are affected. This also applies if you run the PowerShell script on a new device, and outstanding compliance issues are identified.
Additionally, each time the script runs, any non-compliant assets detected are added to the Impacted Assets list for the relevant tasks. Once an issue is resolved (marked as Remediated), the asset is automatically removed from the list. The same applies when an asset is marked as Outscoped, in which case it is also removed from the impacted assets list.