Finn O'Brien
Last updated: 19 November 2025
In this article, you will find:
Navigation guidance for accessing the Incident Management area within the platform
The process of reviewing and recording incidents
Within the Incident Management page you will be able to view, log, and review any security incidents that have taken place within your business, allowing you to keep all ISMS related information within the OneClickComply platform. You can access this area by selecting the Incident Management button from within Compliance > ISMS, as shown below:
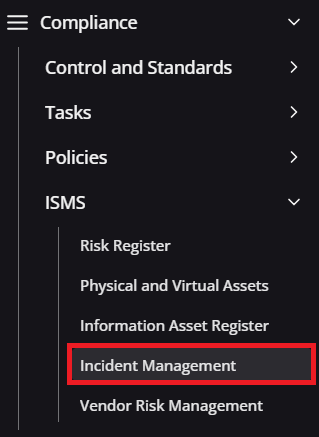
Incident management navigation guidance
Documenting and responding to incidents is a core component of compliance with standards such as ISO 27001 and SOC 2. The OneClickComply platform allows you to collate all of the incidents that have occurred within your business, and document them in one central place. Let's have a look an example incident on the main Incident Management screen:

Example incident management area
There are filters for Severity, as well as Resolution Status to help locate specific tasks. Selecting Review on an incident brings up the following page:
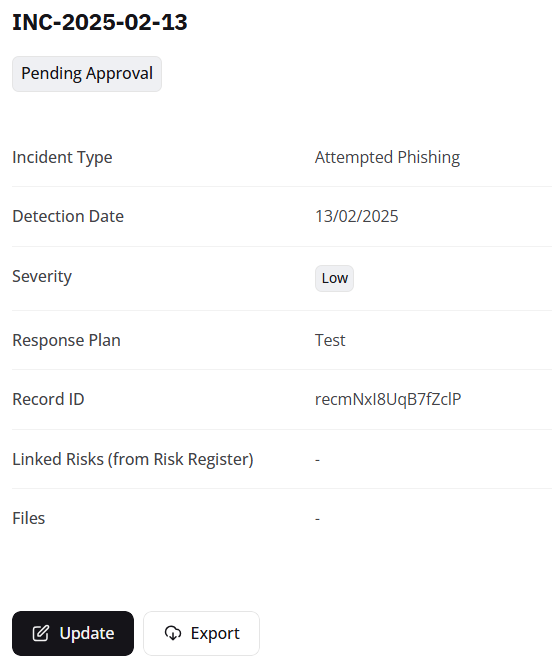
A screenshot of an incident currently being reviewed
As shown above, the incident is broken down into different categories:
Name: The name of the incident using the year, month, and day of the event.
Approval State: Indicates whether the task details have been approved.
Incident Type: Used to briefly outline the details of the incident. Other examples could include other types of digital threats such as DDoS attacks, or physical incidents such as trespassing.
Detection Date: A timestamp of when the incident arose
Severity: A category to show the impact of the incident had on business operations. The categories are: Low, Medium, High, and Critical.
Response Plan: A record of the steps to respond to the incident. For example, a phishing attempt can be responded to by quarantining the targeted inbox, blacklisting the sender, and updating associated playbooks.
Record ID: A unique ID that can either be used internally by your business, or by a member of the OneClickComply team if you experience an issue with this specific incident record.
Linked Risks: This area can be used to link incidents to risks already outlined in your Risk Register. This allows businesses to demonstrate that mitigation or avoidance strategies within their Risk Register are effective.
Files: Any files associated with this incident can also be uploaded, such as a transcript of the event, a screenshot of a phishing email, or any other record that are relevant to the incident, or may help with future threats.
In order to create/record an incident, you will need to select the Create Incident button, located at the right hand side of the Incident Management page. See below:

Creating a new risk screenshot
Once selected, you will then be prompted to detail the incident using the same categories as detailed previously. Once all of the details are added, click Submit. This will then create the incident and place it into the Pending Approval state.
In order to approve the incident, click Review, then Update, and set the resolution status to Approved.