Finn O'Brien
Last updated: 12 January 2026
In this article, you will find:
Navigation guidance for viewing and completing controls and tasks.
Step-by-step guides for completing technical and operational tasks, and updating the status of controls.
There are three separate methods of accessing the controls of standards within the OneClickComply platform. These are:
Through the homepage
Through the Compliance Standards page
Through the Control Management area
See below for information regarding each of these navigation routes.
On the homepage of the OneClickComply platform, simply click on the standard that you wish to view the controls of. This will bring you to a new page dedicated that particular standard.
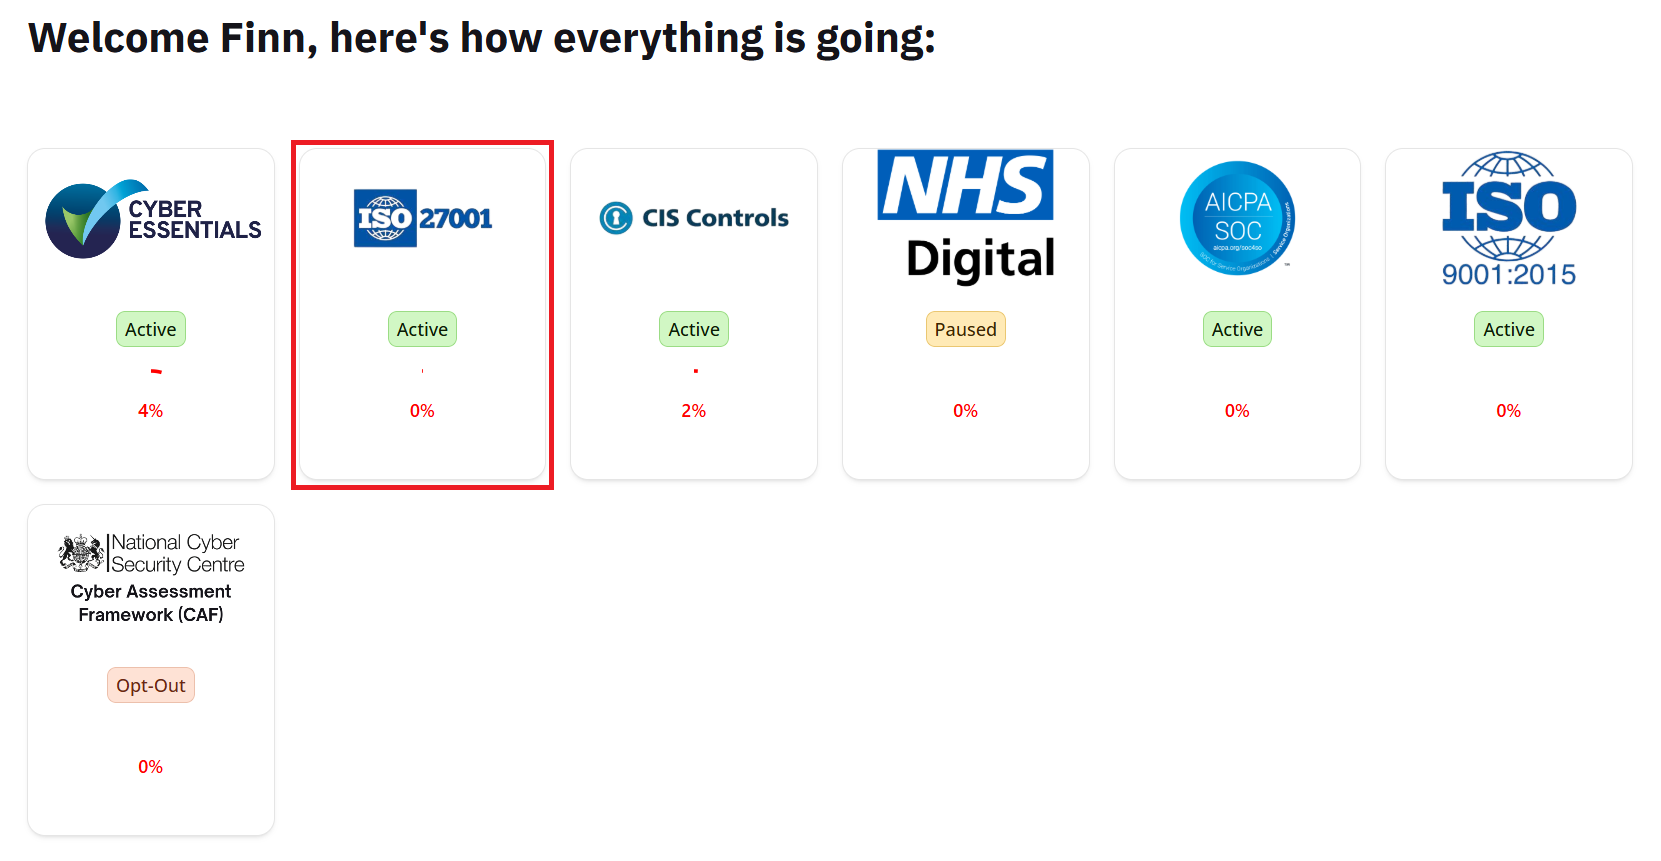
Accessing controls via the homepage
From the main navigation bar, select Compliance > Controls and Standards > Standards.

Navigation guidance for the standards page
On this new page, any standard that has an Active or Paused status tag will have an additional option called Controls. Selecting this will bring you to the control management area for the selected standard.
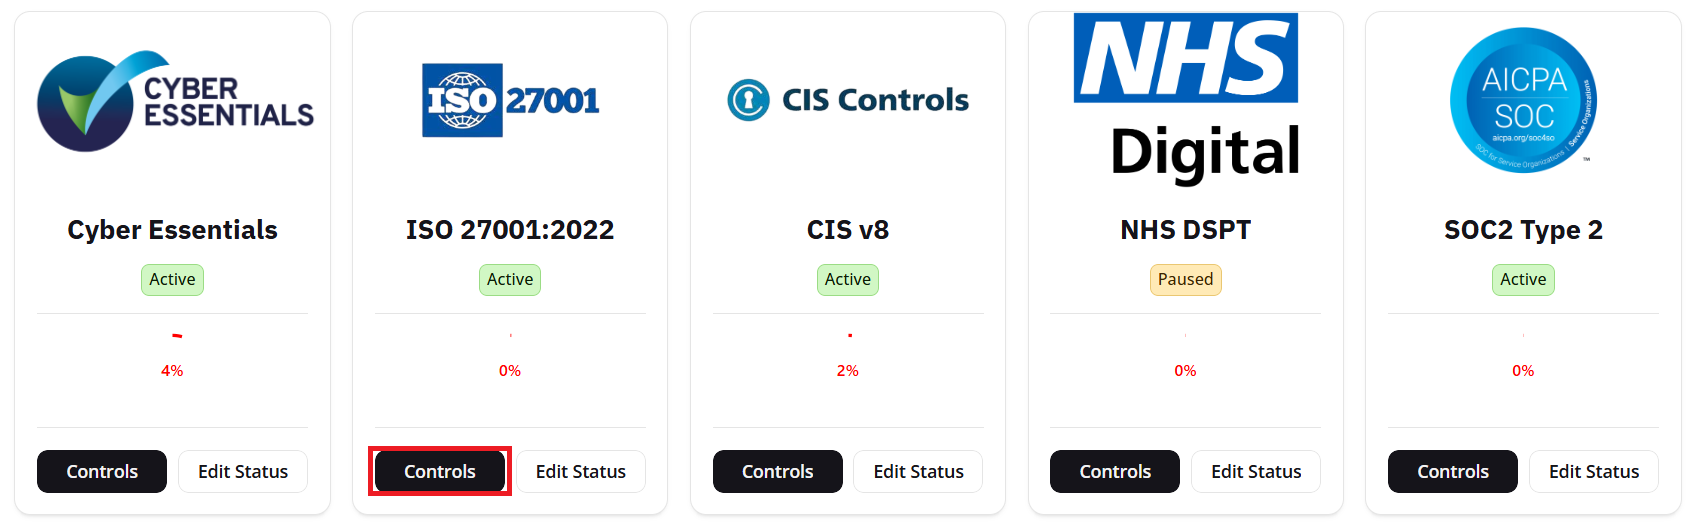
Accessing controls via the compliance standards page
From the main navigation bar, select Compliance > Controls and Standards > Control Management.

Navigation guidance for the control management area
This method differs from the previous two options, as the resulting page will list all the controls for all compliance standards that are current set as Active within your account.
Once you have followed one of the routes above, you will see a page similar to the example below:
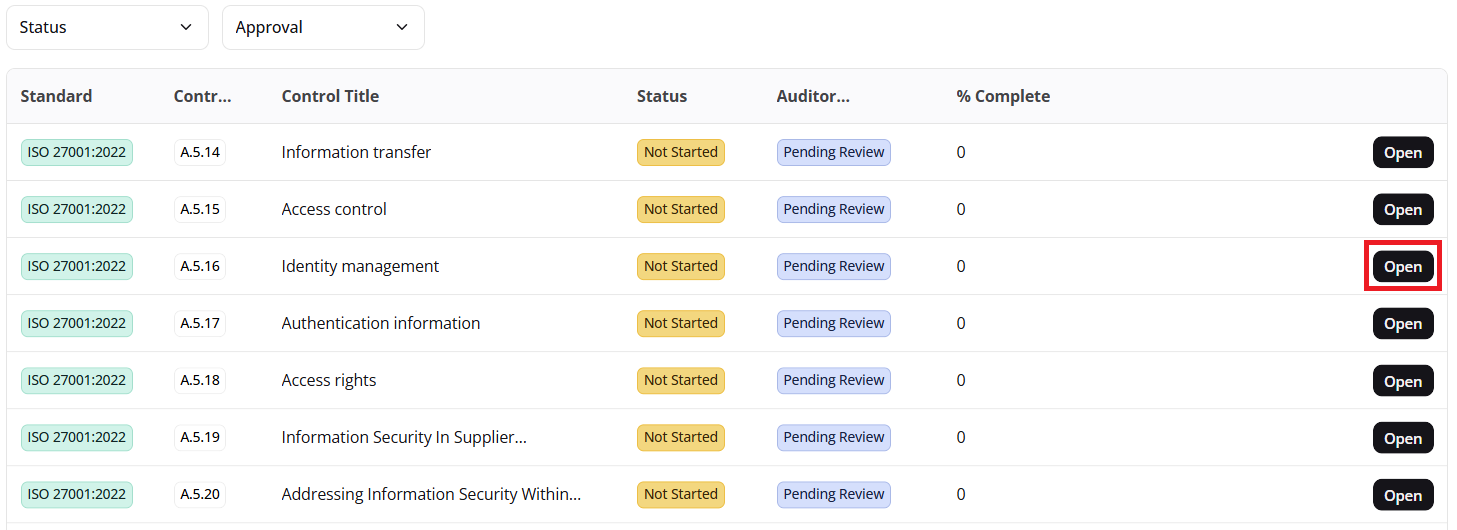
Example screenshot of control management area
To view more information about a specific control, select the Open button on the right-hand side of the table to bring up a more detailed view about the chosen control.
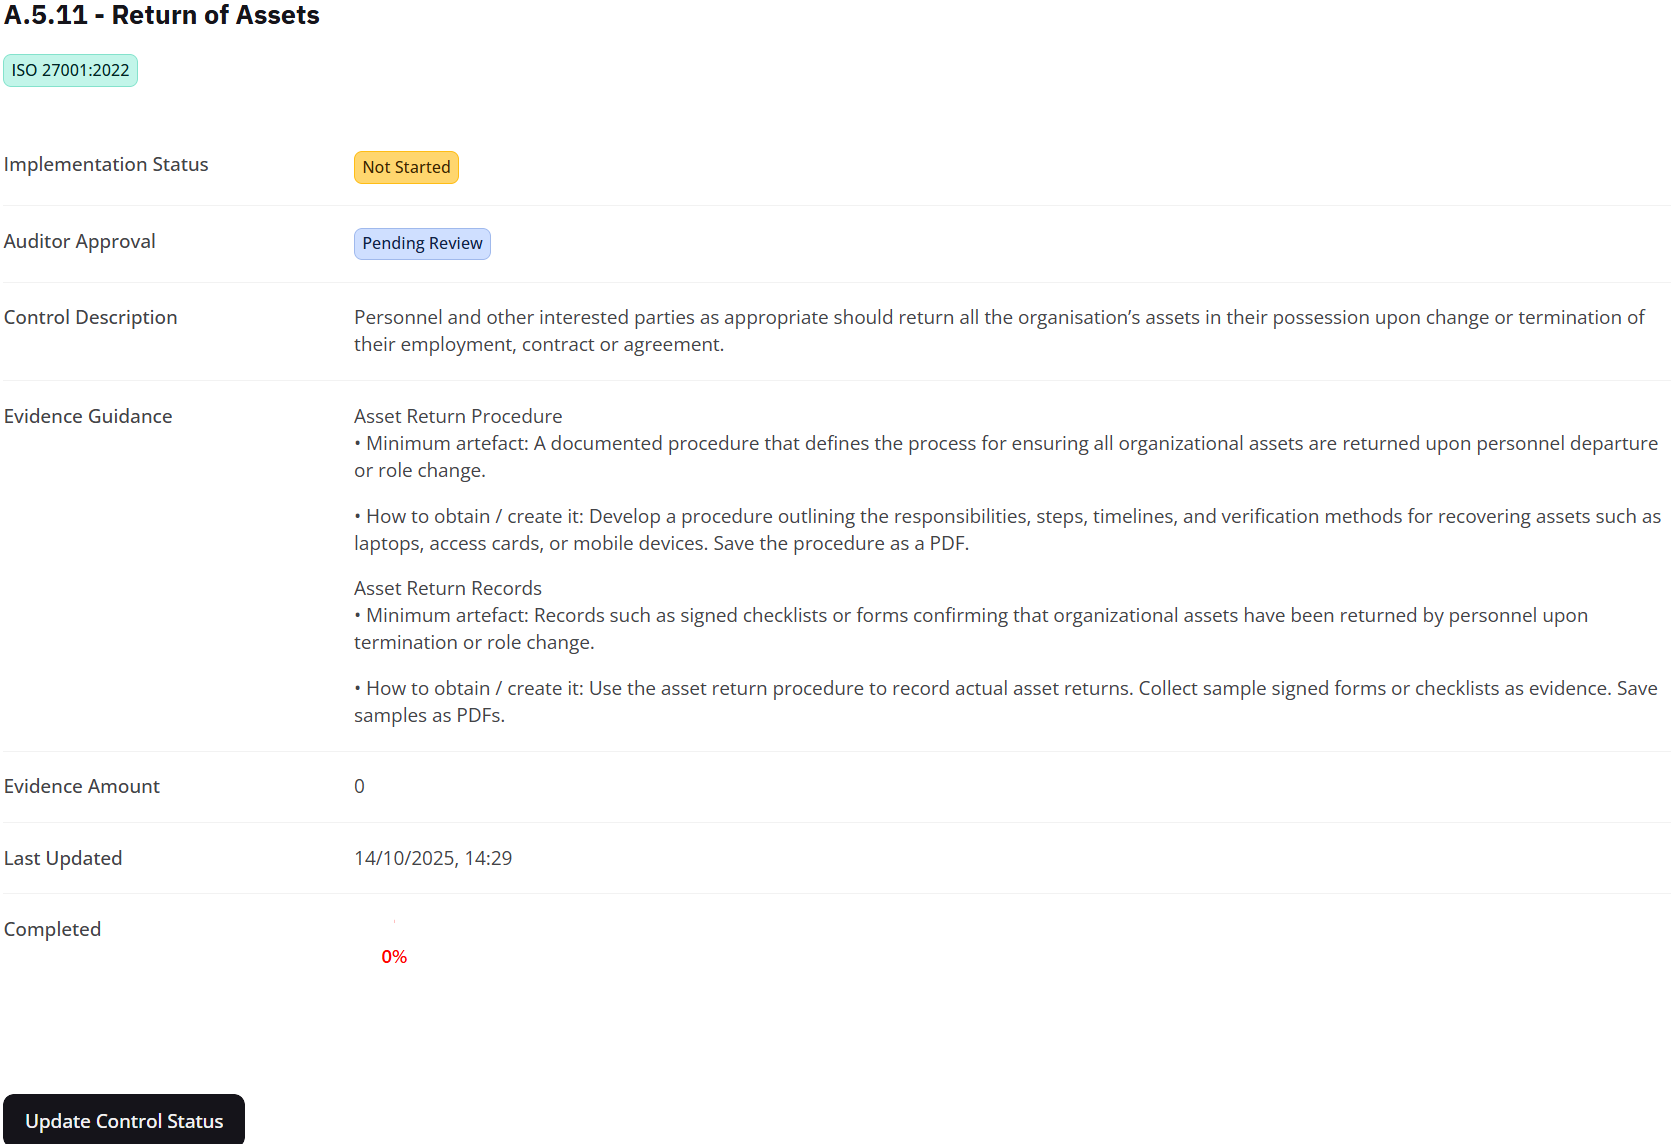
Example control details page
When reviewing a control in detail, scroll down the page to view the specific tasks associated with this control. They will be separated into Technical and Operational categories, as shown below:

Technical task examples
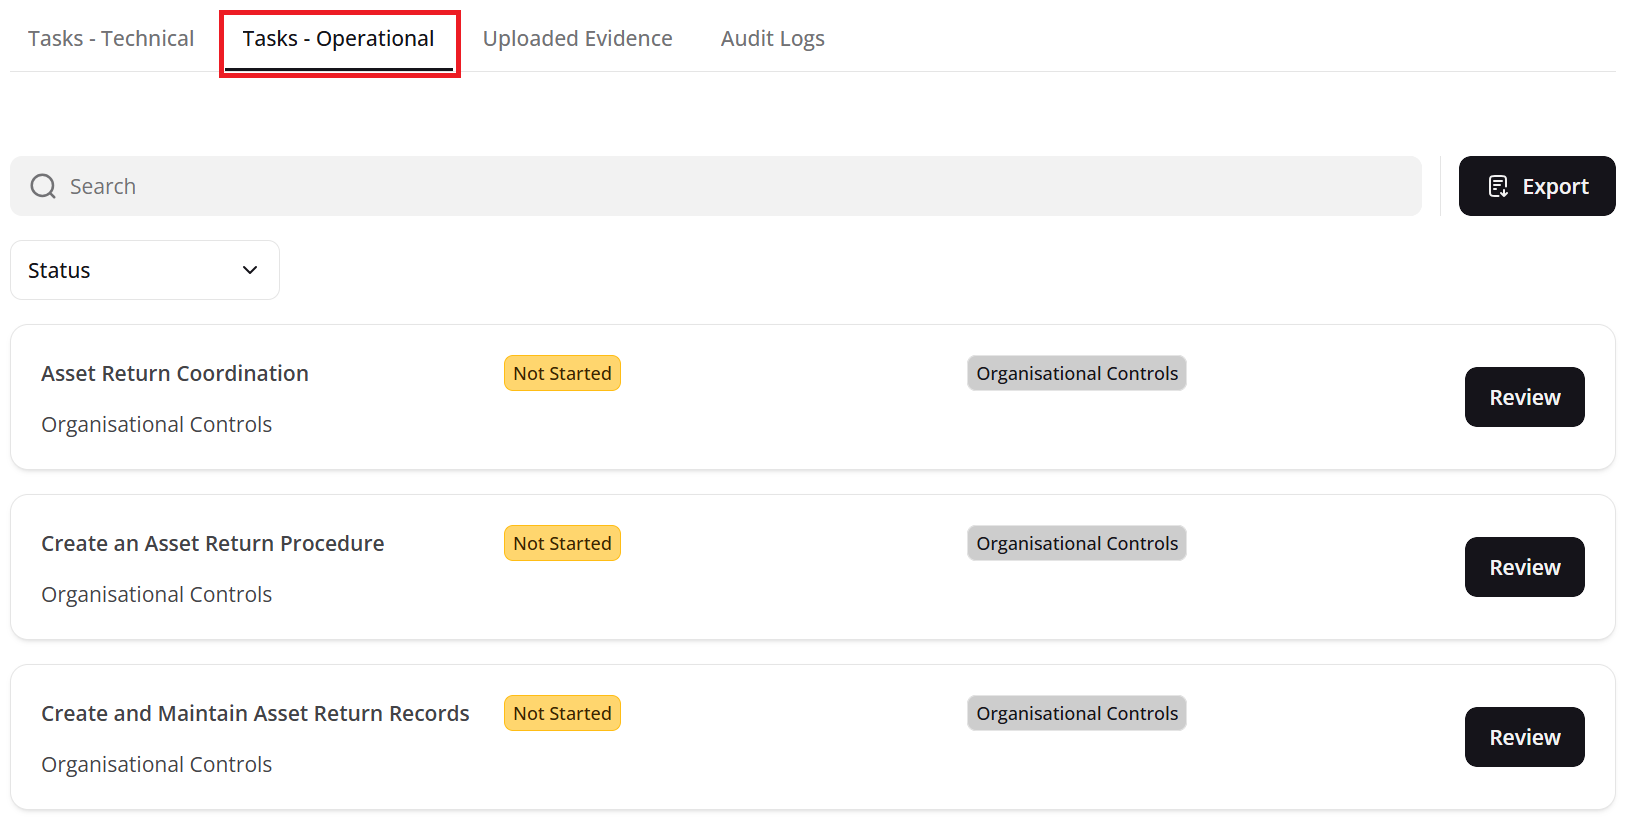
Operational task examples
In order to meet the requirements of a control, you must complete all Technical and Operational Tasks associated with it. Let's start by looking at how to complete Technical tasks:

Technical Task Example
To complete a Technical task, click the Review button as shown above. This will open a side window with additional details about the task. Let's look at this new window below:

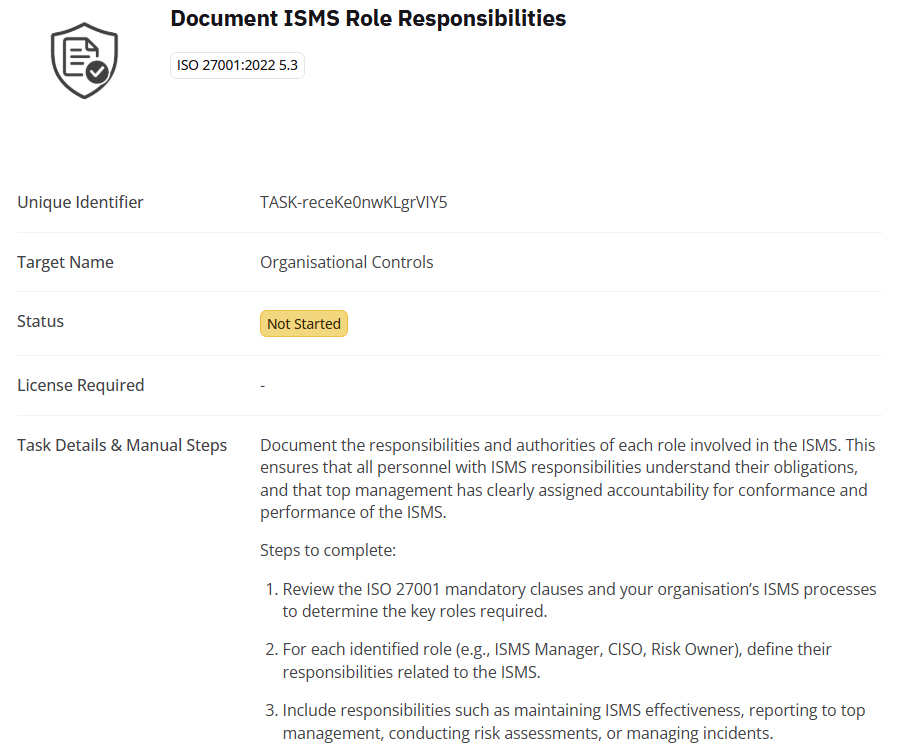
Viewing Tasks in More Detail
Each Technical task will contain the following information:
Task Title: A general overview of the requirements of the task.
Associated Controls: Shows any other standards and controls that this task may be linked to.
Unique Identifier: A short key that allows the OneClickComply team to troubleshoot specific tasks or automations.
Target Name: The environment/integration that will be altered by completing the task.
Licenses Required: A list of the specific licenses that are required to make these changes within your environment.
Task Details & Manual Steps: Outlines what the automation will implement, as well as the manual steps you can follow if you wish to make changes by hand. Some tasks may have an additional section labelled Impact, which will outline what changes users within your organisation may experience.
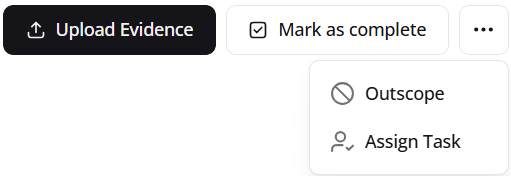
Underneath the Task Details & Manual Steps area there will be several options, shown below:
Technical task options
The Fix this for me button is one of the most important buttons on the platform. Pressing this will enable the platform's automations to change the required settings within your tenancy, setting them to be in-line with that control. This automation is then reflected within the Audit Logs, indicating who authorised the automation, when it was conducted, and what area of your tenancy was affected.
Selecting Upload Evidence allows you to manually upload evidence to the task to prove completion. This is an important step if you decide to make a change by hand, as an auditor will expect to see evidence that you have correctly implemented the requirements of a control.
Selecting Mark as Complete allows you to manually mark the task as complete. This option should only be selected if you have already completed a task by hand and uploaded the appropriate evidence, or the task is related to a cloud platform (see below).
Selecting Outscope will tell the OneClickComply platform that task is not applicable to your organisation, removing it from any future compliance scans, and from impacting your overall alignment percentage.
In order to outscope a task, you will need to provide an explanation for outscoping, and to confirm that the information you provided is correct. This is so that auditors can understand why you believe the task does not apply to you, and validate your answer.
Selecting Assign Task will allow you to assign the task to another user within your organisation who has an account on the OneClickComply platform. You simply need to provide the email address of the user, the due date for the task to be completed by, the priority of the task, and any other details that may be relevant.
Any technical tasks that are linked to cloud platforms such as AWS, Azure, or Google Cloud, have a slightly different completion method. Once you click Fix this for me, a new window will open containing a CLI command that can be copied and pasted into the console or terminal of the associated cloud platform. See below for an example:
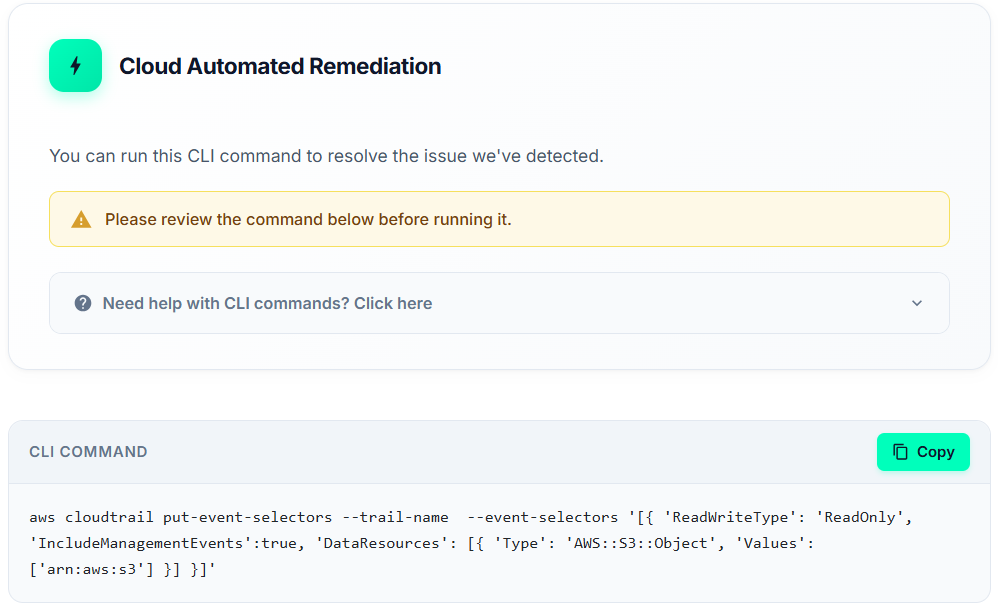
Example CLI command
This approach allows for consistent results across all cloud platforms for all users, regardless of setup or complexity. Once completed, users can click the Mark as Complete option to set the task status as Complete.
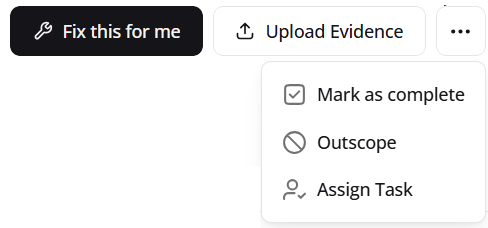
The process for completing Operational tasks is near identical to completing Technical tasks. However, as Operational tasks are more administrative, they cannot be completed automatically.
Instead, you will find the following options:
Upload Evidence
Mark as Complete
Outscope
Assign Task
Example operational task and management options
Note: Operational tasks will require specific evidence to be attached in order to satisfy the requirements of a control. Information about this evidence will be outlined in the description of the control, and in the Task Details & Manual Steps area.
The OneClickComply platform allows users to update the status of each individual control to reflect any current progress being made. If tasks are being actioned, the control is no longer within scope, or everything has been completed, the status of the control should be updated to match.
To update the status of a control, navigate to the Control Details page, shown by the example below:

Example control details page
Underneath details of the control you will find an option labelled Update Control Status.
Selecting this button will open a new window where you can change the status and scope of the control.

Updating Control Status
Controls can be set to one of the following statuses, and should be regularly reviewed and updated to ensure that they match current operations within the business:
Not Started - No progress has been made.
In Progress - The control is currently being reviewed and implemented.
Completed - All tasks and evidence requirements have been met.
Outscoped - The task is not relevant to the organisation.
Note: Setting a control as Outscoped will require an explanation for the change in scope, as auditors need to understand your rationale behind decisions regarding controls.