Finn O'Brien
Last updated: 29 October 2025
In this article, you will find:
Navigation guidance for attaching evidence to tasks.
Key information about compliance evidence.
Note: This guide will only cover the process of uploading evidence for Operational tasks, or when completing a Technical task manually. To learn about viewing evidence gathered automatically by the OneClickComply platform, please see our dedicated support article.
To upload evidence, navigate to the required tasks through either the All Tasks list, or by viewing the tasks associated with a specific control through the Control Management area.
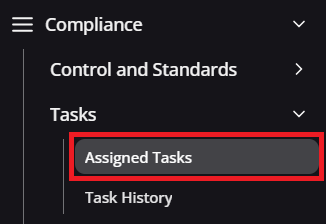
To access tasks through the All Tasks list, navigate to Compliance > Tasks > Assigned Tasks > All Tasks.

Navigation guidance for all tasks area
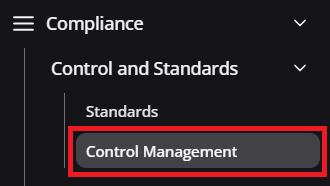
To access tasks through a specific control, select the standard you wish to manage from the homepage, then select the control that contains the desired task from within the Control Management area.
Navigation guidance for control management area
Once you have located the task you wish to assign, click the Review option to open the task side window.
If you choose to complete a Technical task manually, you will also need to attach supporting evidence to prove compliance with the control's requirements. For technical changes or implementations, typically uploaded evidence will be screenshots, screen recordings, or documentation proving that the requirement has been met.
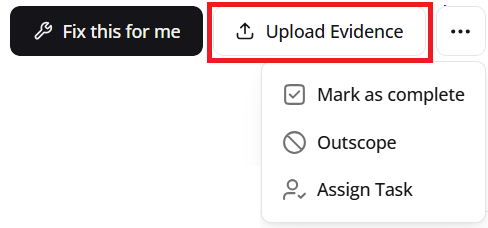
To upload evidence to a Technical task, select the Upload Evidence option located next to the Fix this for me button, as shown below:
Upload evidence option
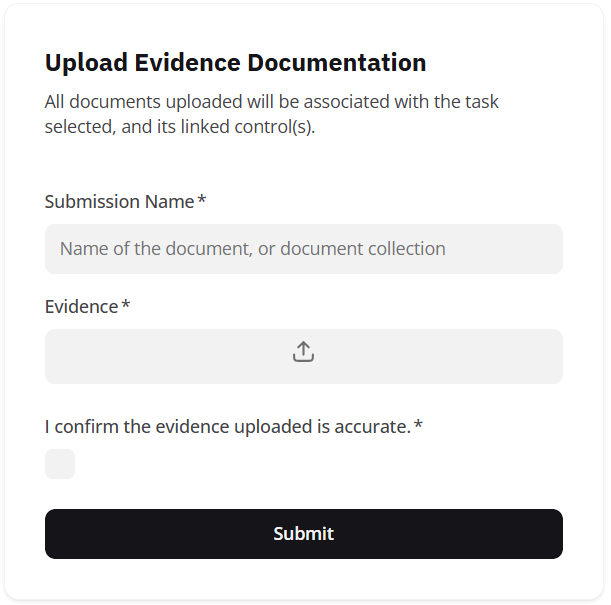
Upon selecting this option, a new window will open where you can upload and name any evidence you wish to provide.

Evidence upload process
Once you have uploaded and named your document, click Submit. The uploaded evidence will be automatically attached to both the specific task, and the associated control.
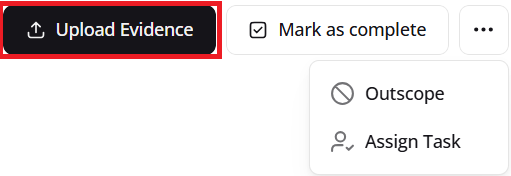
In order to complete any Operational task, the necessary evidence must be uploaded in order to prove compliance with the control's requirements. To do this, simply select the Upload Evidence option, located underneath the Task Details & Manual Steps area, as shown below:
Upload evidence option
Upon selecting this option, a new window will open where you can upload and name any evidence you wish to provide.
Evidence upload process
Note: Operational tasks will often list the required evidence within the Task Details area. Alternatively, the Evidence Guidance section of the associated control will outline what's normally provided.
Once you have uploaded and named your document, click Submit. The uploaded evidence will be automatically attached to both the specific task, and the associated control.